The Tankless Job: Another Plumbing Project from Hell
A few years ago, when I had the Mother of all Drain Clogs, I thought I could fix the problem with muriatic acid. The acid ate every piece of plumbing in my bathroom (but left the clog untouched). To replace the pipes, I had to disconnect my clawfoot bathtub and slide it into the living room, where it lived for the next three weeks. Once I removed the tub, I figured I might as well tear up the ugly formica behind it. Of course the plaster came with it, and I had to replaster the entire wall. So, I repainted the entire bathroom, and refinished the floor while I was at it.
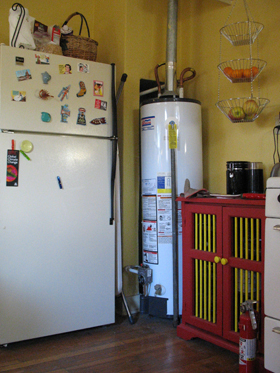
But that was nothing compared to the momentous decision to replace my conventional water heater with a tankless job. The original water heater was not only an eyesore but consumed prescious space in an 800-foot-square house shared by two bipeds and three supersized putty-tats. Besides, as most travelers know, the rest of the world has figured out that it doesn't make sense to heat a 40-gallon kettle 24 hours a day when you're only going to drink a few cups of tea.

The project acquired considerable momentum when we realized that a tankless water heater could be installed in an opening at the base of the old chimney. But first, we had to rebuild our 70-year-old chimney.

Who knew that bricks come in many different sizes? After hauling 48 of them, two at a time, up the ladder, we had to take them all back down again and rebuild the chimney with scrap bricks from the backyard.
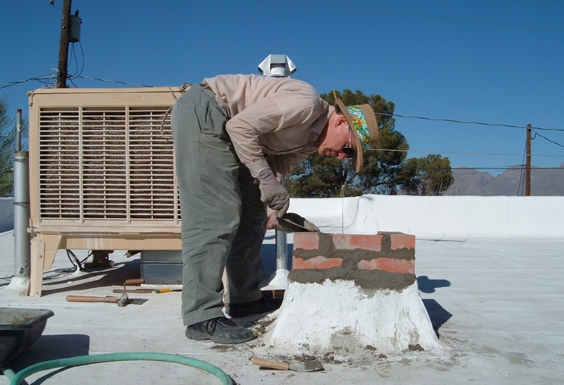
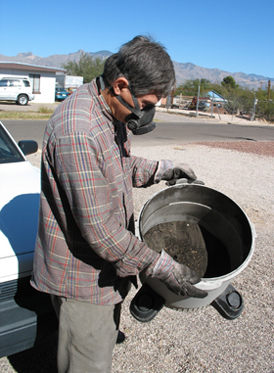
We hired a handyman to help with the installation, but there was a hard freeze the night before and he was called away to fix a broken pipe. While working on the roof, he slipped and fell, breaking a rib. Meanwhile, Dennis had thawed our own frozen garden hose, drained the old water heater, and wrestled it out of the house. We were past the point of no return.
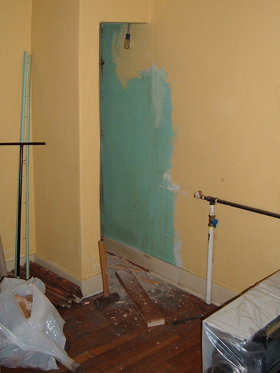
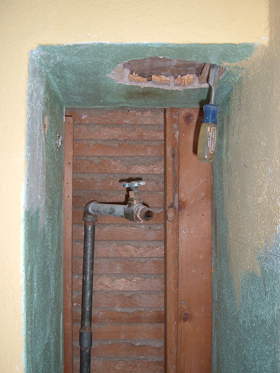
All we had to do was a punch a hole in the base of the old chimney and connect the new vent pipe. But above the plaster was a four-inch chunk of extremely hard wood. And above the wood was a layer of bricks. Then another layer of bricks. Then about six inches of cement. When we finally punched through the cement, there was a shower of soot and cinders from an old coal stove — about one foot of debris in all — and there was nowhere to go but down.
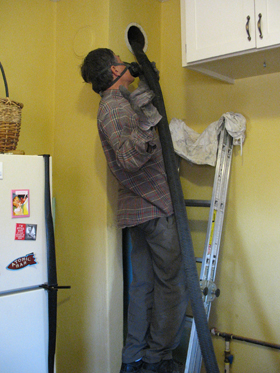

Tankless water heaters burn much hotter than conventional boilers, so this installation requires Type B insulated vent pipe. And because we live above 2000 feet, the manufacturer recommends 6" rather than the standard 5". Of course all of the fittings are non-standard as well, and the "chimney chase" to support the vent pipe and seal off the top of the chimney is a special order.

The date of an eventual payback in energy savings is galloping into the future, and meanwhile we are showering with a garden hose that has hopefully collected some afternoon solar heat.

One web site recommended using a router to enlarge the opening (nobody gets this joke).
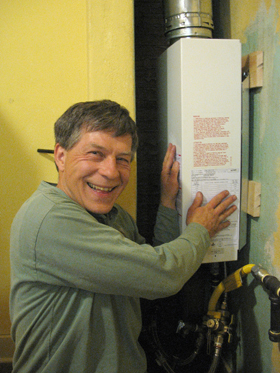
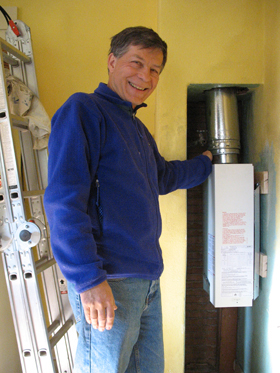
10:04 pm Tuesday, December 5, 2006 — We opened the valves, turned on the hot water tap and ... nothing happened. There was no loud noise and neither the vent pipe nor the box got warm. But over at the kitchen sink, it was another story. Within minutes, the water was almost boiling. Unlike the on-demand hot water heaters I remember from Eastern Europe, this model makes very little noise, has no visible flame and both the tank and vent pipe remain cool to the touch.
Total cost of this project:
Bosch Aquastar 1600H tankless water heater — $600
Miscellaneous valves — $70
6" type B vent pipe and cap — $130
Custom-built "chimney chase" — $50
3/4" black and galvanized pipe — $70
Hot water in the outdoor shower tonight — PRICELESS!
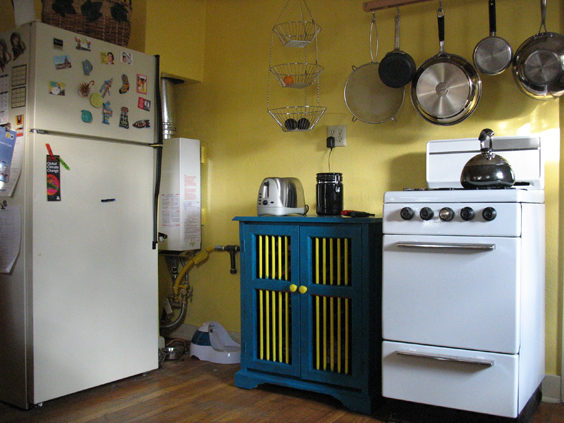
Our New Kitchen, Phase I: After the new water heater, before the new counter and the tiled wall.
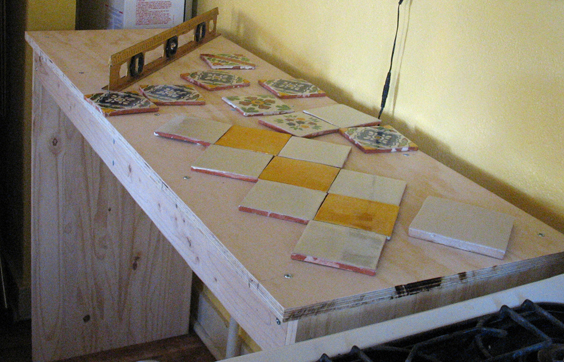
The new counter begins to take shape.
